Photopea - Stretched Text Effect
Hi Everyone, This is Daniel form f&D. In this video, We are going to see How to make the Stretched Text Effect in Photopea.
Steps:
0:00 About Stretched Text Effect
0:06 Intro
0:15 Open a Project in Photopea
0:25 Type a Text
1:05 Convert Text to Shape
1:16 Select Direct Select Tool
1:31 Draw the Below Half Selection
1:52 Stretch the Text
2:08 Brief
2:19 Conclusion
Also Watch:
Convert Anything to Gold - https://youtu.be/HJyu6EVFU4Y
Subscribe us:
http://bit.ly/Subscribe-fandD
Showing posts with label Photopea Tutorials. Show all posts
Showing posts with label Photopea Tutorials. Show all posts
Monday, September 12, 2022

Friday, August 5, 2022
How to Convert Anything to Gold in Photopea | Photo Editing | Free Photo...
Photopea - Convert Anything to Gold
Hi Everyone, This is Daniel from f&D. In this video, We are going to see How to Convert to Gold in Photopea. Photopea is the free browser alternative to Photoshop. Hence you can try this method in Photoshop as well.
Steps:
0:00 About Photopea Tutorial
0:09 Intro
0:16 Open your Image in Photopea
0:19 Remove the Background
0:48 Add New Black Background
1:03 Desaturate
1:24 Invert and Difference Blend Mode
2:05 Gold Gradient Map
2:27 Clipping Mask
2:34 Adding Depth
3:23 Conclusion
3:34 Outro
That's it. Thanks for Watching
Also Watch:
Creative Outline Text in Photopea - https://youtu.be/f2n_tGNmgE0
Subscribe us:
http://bit.ly/Subscribe-fandD
Monday, July 4, 2022
Photopea - How to Create Crumbled PAPER TEXTURE | Free Browser Photoshop
Hi Everyone, This is Daniel from f&D. In this video, I'm gonna show you How to create Paper Texture from scratch in photopea. This paper texture is crumbled. Photopea is more or less same as the photoshop, Hence if you are familiar in photoshop you can easily recreate this same method in photoshop as well.
Steps:
00:00 About Photopea Tutorial
00:07 f&D Intro
00:12 Open Photopea and Create a New Image
00:34 Use Gradient Tool to create Diamond Gradients
01:06 Filter - Stylize - Emboss
01:46 Add Levels to Adjust the Texture
02:08 Adding Text over the Texture
02:44 Adding Blending Options to the Text
02:59 Adjust the Levels
03:23 Thanks for Watching
03:33 Outro
Thanks for Watching.
Also Watch:
How to Add Spot Light Effect in Photopea - https://youtu.be/EhZl7DJpHfE
Subscribe us:
http://bit.ly/Subscribe-fandD
Thursday, March 3, 2022
How to Add Spot Light Effect in Photopea | Browser Photoshop
Photopea - How to Add Spot Light
Hi Everyone, This is Daniel from f&D. In this video, I'm gonna show you How to add Spot Light Effect in Image using Photopea.
Steps:
1. Open Image in Photopea. Sample Image
2. Add Curves Adjustment Layer to Darken the Background.
3. Add a New Layer
4. Draw the Rectangular Selection using Rectangle Selection Tool
5. Add the Gradient with white in left side and transparency in right side
6. Make it look like the spot light using Perspective Tool
7. Add Blur to the Spot Light
That's it. Thanks for Watching.
Also Watch:
How to create a Text Portrait in Photopea - https://youtu.be/5VIqzaPUxP4
Subscribe us:
http://bit.ly/Subscribe-fandD
Sunday, December 26, 2021
How to create a Text Portrait in Photopea | Browser Photoshop
How to create a Text Portrait in Photopea | Portrait made of Text
Hi Everyone, In this video, I'm gonna show you How to create a Text Portrait in Photopea. This is the amazing typography poster tutorial.
Note:
Photopea is the Browser Alternative for Photoshop. Hence you can try this same method.
Steps:
1. Open Photopea and Drag and Drop your Image. Sample Image
2. Remove Background using Magic Cut - https://youtu.be/TTQMYEkdKro
3. Add a Black Color Fill below the Image
4. Add a Black and White Adjustment Layer
5. Add a Curves Adjustment Layer to add contrast
6. Add a New Layer and add rectangular selection to the half of the face and fill it with the black color
7. Add a Text to the half of the face
8. Make the Text to Group and make the group to layer
9. Make the Text to Selection
10. Select the Half Black Layer and add a raster mask.
That's it. Thanks for watching.
Also Watch:
How to Turn Summer into Winter Scene: https://youtu.be/ETDy9b64MwQ
Subscribe us:
http://bit.ly/Subscribe-fandD
Saturday, December 18, 2021
How to Turn Summer into Winter in Photopea
Convert Summer Scene to Winter Scene in Photopea
Hi Everyone, This is Daniel from f&D. In this video, I'm gonna show you How to convert a summer scene into winter scene using Photopea.
Note:
Photopea is the Browser Alternative for Photoshop. Hence you can try this same method in Photoshop as well.
Steps:
1. Open your Image in Photopea
2. Add a Black and White Adjustment layer with Luminosity Blend Mode
3. Change the Red and Green Value to 200
4. Then add a Hue and Saturation Adjustment Layer
5. Reduce the Saturation to -90 and Increase the Lightness value to 90 in both the green and yellow to affect only the grass and trees
6. Go to Blending Option of the Hue and Saturation layer and make it affect only the Highlights of the Image
7. Then we can increase the saturation of the remaining colors if we want to.
That's it. Thanks for Watching.
Also Watch:
Photopea Galax Face Logo: https://youtu.be/2aRdiXcUox4
Subscribe us:
http://bit.ly/Subscribe-fandD
Saturday, December 11, 2021
Photopea - Galaxy Logo Design from Face | Browser Photoshop
Photopea - Galaxy Logo from Face
Hi Everyone, This is Daniel from f&D. In this video I'm gonna show you How to create Galaxy Logo Design from a face using the free and browser based photo editor called Photopea
Note:
Photopea is the browser alternative for Photoshop. Hence you can try this same method in Photoshop as well
Steps:
1. Create a New Image with 1920x1080. FACE
2. Drag and Drop your Image
3. Extract Face from it
4. Add Threshold
5. Extract the Black areas from the threshold to extract the face
6. Add Galaxy Image. GALAXY
7. Clip Mask it with face
That's it. Thanks for Watching.
Also Watch:
Duotone Effect: https://youtu.be/OeKMwOcde_E
Subscribe us:
http://bit.ly/Subscribe-fandD
Friday, November 19, 2021
Duotone Effect in Photopea | Photopea Tutorial | Browser Photoshop
Photopea - Duotone Effect
Hi Everyone, This is Daniel from f&D. In this video, We are going to see How to make Duotone Effect in Photopea. Duotone Image is composed of two colors. One for the Highlights and other for the Shadows.
Note:
Photopea is the browser alternative for Photoshop. Hence you can try this same method in Photoshop as well.
Steps:
1. Open your Image in Photopea. Sample Image 1 2
2. Go to Channels and Select which channel has good contrast
3. Make that Channel to Selection
4. Add a Color Fill with Lighter Color, this acts as a Highlight
5. Then add a shadow color fill below the highlight color fill.
That's it. Thanks for Watching.
Also Watch:
Monochrome Effect - https://youtu.be/H6oVT3dXR_w
Subscribe us:
http://bit.ly/Subscribe-fandD
Saturday, October 23, 2021
How to Add Image inside a Text in Photopea | Browser Photoshop
Photopea - Insert Image inside a Text
Hi Everyone, This is Daniel from f&D, In this video I'm gonna show you How to add image inside a Text in Photopea.
Note:
Photopea is the browser alternative for Photopea. Hence you can try this same method in Photoshop as well
Steps:
1. Open Photopea
2. Create a New File with 1920x1080
3. Drag and Drop the Image. Sample Image
4. Add Text
5. Move the Image layer below the Text
6. Add Clipping Mask
7. Add Some Effects
That's it. Thanks for Watching
Also Watch:
Text behind a Person: https://youtu.be/cdMGs6arFpg
Subscribe us:
http://bit.ly/Subscribe-fandD
Sunday, October 17, 2021
How to place Text Behind a Person or an Object in Photopea | Browser Pho...
Photopea Tutorial : Add Text Behind Anything
Hi Everyone, This is Daniel from f&D. In this video I'm gonna show you How to add a text behind a person or an object in Photopea.
Note:
Photopea is the browser alternative for Photoshop. Hence you can try this same method in Photoshop as well.
Steps:
1. Open Photopea and Drag and drop your Image. Sample Image
2. Extract the Subject from the Background and make it as a new layer
3. Add a Text, Scale it and Change its Font
4. Move the Text Layer in between the Background and Extracted Subject Layer
That's it. Thanks for Watching
Also Watch:
Remove Acne and Soften Skin: https://youtu.be/hpr5PNsIdZ0
Subscribe us:
http://bit.ly/Subscribe-fandD
Friday, October 8, 2021
How to Remove Acne and Soften Skin in Photopea | High-End Skin Softening...
Photopea Tutorial: How to Remove Acne, Pimples, Blemishes and Scars and also How to do High-End Skin Softening without Losing the Skin Texture of the Face.
Hi Everyone, This is Daniel from f&D. In this video, We are going to see How to Remove pimples and Acne and also Soften Skin using the Browser Photo Editor called Photopea
Note:
Photopea is the Browser Alternative for Photoshop. Hence you can try this same method in Photoshop as well.
Steps:
1. Open your Image in Photopea. Sample Image
2. Remove Redness from the Face using the Hue and Saturation Slider
3. Remove Acne, Blemishes and Pimples using Spot Healing Brush Tool
4. Duplicate the Image
5. Invert the Image
6. Go to Filters - Other - High Pass and Change the value to 24
7. Go to Filters - Blur - Gaussian Blur and Adjust the value according to your Image
8. Add Softness only to the Face using Raster Mask
That's it. Thanks for Watching
Also Watch:
Match Colors in Photopea: https://youtu.be/UYNHYEUCHtI
Subscribe us:
http://bit.ly/Subscribe-fandD
Tuesday, October 5, 2021
Photopea - Glitch Effect
Photopea Tutorial - Glitch Effect
Hi Everyone, This is Daniel from f&D. In this video, We are going to see How to create a Glitch Effect in Photopea Online Editor.
Note:
Photopea is the Browser Alternative for Photoshop. Hence you can try this same method in Photoshop as well.
Steps:
1. Open Photopea
2. Drag and Drop your Image. Sample Image
3. Duplicate the Image and Desaturate
4. Again Duplicate the Desaturated Image
5. Go to Blending Option and uncheck the Red Channel
6. Move the Layer to the left or right to create RGB Split Effect
7. Add the Glitch Lines and make the Blend Mode to Overlay and Reduce the Opacity to 50
8. Add Glitch Effect using Rectangle Select Tool and Move Tool
That's it. Thanks for Watching
Photopea Pencil Drawing Effect - https://youtu.be/ZvSwxpS3wLU
Subscribe us:
http://bit.ly/Subscribe-fandD
Wednesday, September 29, 2021
Match Colors using Photopea in Simple Steps!
Photopea Tutorial: Color Matching in Photopea (Fast and Easy Method)
Hi Everyone, This is Daniel from f&D. In this video I'm gonna show you How to cut out the person from the different image and place it on the different background and match its color with the background. This method is very simple and make use adobe colors and gradient map. Also we will be blur the background and add overall color grading.
Note:
Photopea is the Browser Alternative for Photoshop. Hence you can try this same method in photoshop as well.
Steps::
1. Open your Images in Photopea. Sample Images - 1 2
2. Cut out the person from the Background and place it on the new background
3. Go to Adobe Colors and to Extract Gradient option
4. Extract Gradient Color Values with 5 Stops
5. Add a new Gradient Map in Photopea
6. Add those extracted gradient colors to this gradient map with the brightness value as position as shown in this video
7. Change the blend mode of gradient map to Overlay or Soft Light
8. Add Blur to the Background
9. Add Overall Color Lookup
That's it. Thanks for Watching
Also Watch:
How to use Magic Cut in Photopea: https://youtu.be/TTQMYEkdKro
Subscribe us:
http://bit.ly/Subscribe-fandD
Monday, September 20, 2021
Whiten Teeth in Photopea | Browser Photoshop | Photopea Tutorial
Photopea Tutorial - Whiten Teeth in Best Way using Photopea Online Editor
Hi Everyone, This is Daniel. In this video I'm gonna show you How to make Whiten Yellow Teeth in Photopea. Using Hue / Saturation Slider we can easily change the color of the teeth from yellow to white.
Note:
1. Open Photopea
2. Drag and Drop the Image. Sample Images 1 2
3. Add a Hue / Saturation Adjustment Layer
4. Select the Yellow Range
5. Adjust the Slider to select only the teeth
6. Change the Saturation to -100 and Lightness to 100
7. Reduce the Hue a little it
8. Brush in the Raster Mask to only affect the Teeth
That's it. Thanks for Watching
Also Watch:
Remove Fence in Photopea: https://youtu.be/OBaZaIpqcFc
Subscribe us:
http://bit.ly/Subscribe-fandD
Sunday, August 22, 2021
Photopea Tutorial - Two Color 3D Text Effect | Photopea Text Effect
Photopea Text Tutorial - Two Color 3D Text Effect
Hi Everyone, In this video I'm gonna show you How to create Two Color 3D Text Effect in Photopea. We are using pink and cyan color in this video, you can also any two different colors.
Steps:
1. Create a New Project
2. Add Text, Change the Color to Cyan and Add Dark Blue Stroke
3. Duplicate the Text and Move it down and move the layer below the text
4. Change its Color to Pink
5. Add Shapes to make it 3D Text
6. Change the Background Color to Stroke Color
7. Make every layer except the Background to Group and Add White Stroke
8. That's it, You can also change the Colors of the Text and Stroke Color
Also Watch:
Photopea Neon Text: https://youtu.be/z62tR2UlXs4
Subscribe us:
http://bit.ly/Subscribe-fandD
Thursday, August 19, 2021
NEON Text Effect | Photopea Text Effect Tutorial | Neon Text Photopea
Photopea - Neon Text Effect Tutorial
Hi Everyone, In this video I'm gonna show you How to make Neon Text Effect in Photopea. This photopea editing tutorial is used to make the text as neon lighting effect. This photopea text effect uses blending options.
Note:
Photopea is the free browser based alternative for Photoshop. Hence you can try this same method in Photoshop as well.
Brick Wall Image
Steps:
1. Download the Brick Wall Image
2. Add Effects to make it look darker
3. Add Text
4. Add Effects from Blending Options to make it look like Neon Text. All Effects used are shown in the Video
That's it. Thanks for Watching.
Also Watch:
Photopea Glass Morphism: https://youtu.be/zSLyhejDN9c
Subscribe us:
http://bit.ly/Subscribe-fandD
Monday, August 2, 2021
How to create Blurry Glass Effect in Photopea | Glassmorphism (Glass Eff...
Photopea Tutorial - Frosted or Blurry Glass Effect
Hi Everyone, This is Daniel from f&D, In this video I'm gonna show you How to create a Glass Morphism or Blurry Glass Effect or simply Glass Effect in Photopea for free.
Note:
Photopea is the free browser Alternative for Photoshop. Hence you can try this same method in Photoshop as well.
Steps:
1. Drag and Drop your Background in Photopea.
2. Duplicate the Image and add gaussian blur to it.
3. Add a Shape and move it behind the blurred layer
4. Clip the Blur layer to the Shape
5. Add Blending options like Stroke, Inner Glow, Gradient Overlay and Shadows to the Shape Layer
That's it.
Thanks for Watching
Also Watch:
Teal and Orange Look in Photopea: https://youtu.be/jK2sLQgu5-k
Subscribe us:
http://bit.ly/Subscribe-fandD
Saturday, June 26, 2021
Photopea Raster Mask (Layer Mask) Explained
Photopea Tutorial | Raster Mask | Layer Mask in Photoshop
Hi Everyone, This is Daniel from f&D, In this video I'm gonna show you How to use Raster Mask in Photopea which is called as Layer Mask in Photoshop and GIMP.
Note:
Photopea is like the poor man's Photoshop. It looks same as the Photoshop and has many similar tools. So you can use the method in Photoshop as well.
In Layer Mask Black means Transparent and White means Opaque
Thanks for Watching
Also Watch:
Photopea Magic Cut: https://youtu.be/RNcoGkZQgKQ
Subscribe us:
http://bit.ly/Subscribe-fandD
Wednesday, May 19, 2021
Photopea - Remove Background using Pen Tool | Browser Photoshop
Photopea Tutorial 1
Hi Everyone, This is Daniel from f&D, In this video I'm gonna show you How to remove background and extract the person or objects using pen tool in Photopea
Note:
Photopea is the free alternative for Photoshop which can be used in any device because it is browser based.
Steps:
1. Drag and Drop the Image inside Photopea
2. Select Pen Tool
3. Draw the Anchor Points around the subject
4. Change the fill to none
5. Change the Shape to Path
6. Make Selection
7. Ctrl + J to Duplicate the Layer with Selection
8. Hide the Original Layer
That's it. Thanks for Watching
Also Watch:
Alternative to Photoshop - The Photopea : https://youtu.be/SihTdfPWOxk
Subscribe us:
http://bit.ly/Subscribe-fandD
Subscribe to:
Posts (Atom)
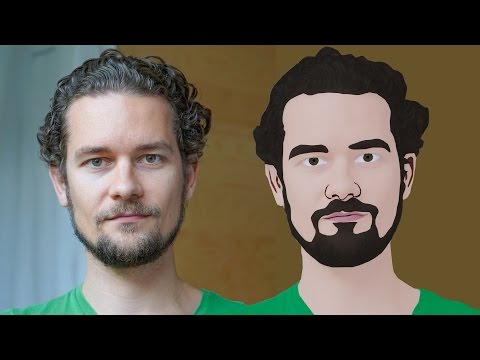
GIMP Cartoon Effect Tutorial
Hi Everyone, In this video I'm gonna show you How to create a Cartoon Version of Yourself or Someone using the Open Source Software...
-
Make your Image sing and vibe for a Song using an Android App Hi Everyone, This is Daniel from f&D. In this video, We are going to see ...
-
Photopea - Neon Text Effect Tutorial Hi Everyone, In this video I'm gonna show you How to make Neon Text Effect in Photopea. This phot...

