Photopea - Insert Image inside a Text
Hi Everyone, This is Daniel from f&D, In this video I'm gonna show you How to add image inside a Text in Photopea.
Note:
Photopea is the browser alternative for Photopea. Hence you can try this same method in Photoshop as well
Steps:
1. Open Photopea
2. Create a New File with 1920x1080
3. Drag and Drop the Image. Sample Image
4. Add Text
5. Move the Image layer below the Text
6. Add Clipping Mask
7. Add Some Effects
That's it. Thanks for Watching
Also Watch:
Text behind a Person: https://youtu.be/cdMGs6arFpg
Subscribe us:
http://bit.ly/Subscribe-fandD
Saturday, October 23, 2021

Sunday, October 17, 2021
How to place Text Behind a Person or an Object in Photopea | Browser Pho...
Photopea Tutorial : Add Text Behind Anything
Hi Everyone, This is Daniel from f&D. In this video I'm gonna show you How to add a text behind a person or an object in Photopea.
Note:
Photopea is the browser alternative for Photoshop. Hence you can try this same method in Photoshop as well.
Steps:
1. Open Photopea and Drag and drop your Image. Sample Image
2. Extract the Subject from the Background and make it as a new layer
3. Add a Text, Scale it and Change its Font
4. Move the Text Layer in between the Background and Extracted Subject Layer
That's it. Thanks for Watching
Also Watch:
Remove Acne and Soften Skin: https://youtu.be/hpr5PNsIdZ0
Subscribe us:
http://bit.ly/Subscribe-fandD
Friday, October 8, 2021
How to Remove Acne and Soften Skin in Photopea | High-End Skin Softening...
Photopea Tutorial: How to Remove Acne, Pimples, Blemishes and Scars and also How to do High-End Skin Softening without Losing the Skin Texture of the Face.
Hi Everyone, This is Daniel from f&D. In this video, We are going to see How to Remove pimples and Acne and also Soften Skin using the Browser Photo Editor called Photopea
Note:
Photopea is the Browser Alternative for Photoshop. Hence you can try this same method in Photoshop as well.
Steps:
1. Open your Image in Photopea. Sample Image
2. Remove Redness from the Face using the Hue and Saturation Slider
3. Remove Acne, Blemishes and Pimples using Spot Healing Brush Tool
4. Duplicate the Image
5. Invert the Image
6. Go to Filters - Other - High Pass and Change the value to 24
7. Go to Filters - Blur - Gaussian Blur and Adjust the value according to your Image
8. Add Softness only to the Face using Raster Mask
That's it. Thanks for Watching
Also Watch:
Match Colors in Photopea: https://youtu.be/UYNHYEUCHtI
Subscribe us:
http://bit.ly/Subscribe-fandD
Tuesday, October 5, 2021
Photopea - Glitch Effect
Photopea Tutorial - Glitch Effect
Hi Everyone, This is Daniel from f&D. In this video, We are going to see How to create a Glitch Effect in Photopea Online Editor.
Note:
Photopea is the Browser Alternative for Photoshop. Hence you can try this same method in Photoshop as well.
Steps:
1. Open Photopea
2. Drag and Drop your Image. Sample Image
3. Duplicate the Image and Desaturate
4. Again Duplicate the Desaturated Image
5. Go to Blending Option and uncheck the Red Channel
6. Move the Layer to the left or right to create RGB Split Effect
7. Add the Glitch Lines and make the Blend Mode to Overlay and Reduce the Opacity to 50
8. Add Glitch Effect using Rectangle Select Tool and Move Tool
That's it. Thanks for Watching
Photopea Pencil Drawing Effect - https://youtu.be/ZvSwxpS3wLU
Subscribe us:
http://bit.ly/Subscribe-fandD
Wednesday, September 29, 2021
Match Colors using Photopea in Simple Steps!
Photopea Tutorial: Color Matching in Photopea (Fast and Easy Method)
Hi Everyone, This is Daniel from f&D. In this video I'm gonna show you How to cut out the person from the different image and place it on the different background and match its color with the background. This method is very simple and make use adobe colors and gradient map. Also we will be blur the background and add overall color grading.
Note:
Photopea is the Browser Alternative for Photoshop. Hence you can try this same method in photoshop as well.
Steps::
1. Open your Images in Photopea. Sample Images - 1 2
2. Cut out the person from the Background and place it on the new background
3. Go to Adobe Colors and to Extract Gradient option
4. Extract Gradient Color Values with 5 Stops
5. Add a new Gradient Map in Photopea
6. Add those extracted gradient colors to this gradient map with the brightness value as position as shown in this video
7. Change the blend mode of gradient map to Overlay or Soft Light
8. Add Blur to the Background
9. Add Overall Color Lookup
That's it. Thanks for Watching
Also Watch:
How to use Magic Cut in Photopea: https://youtu.be/TTQMYEkdKro
Subscribe us:
http://bit.ly/Subscribe-fandD
Monday, September 20, 2021
Whiten Teeth in Photopea | Browser Photoshop | Photopea Tutorial
Photopea Tutorial - Whiten Teeth in Best Way using Photopea Online Editor
Hi Everyone, This is Daniel. In this video I'm gonna show you How to make Whiten Yellow Teeth in Photopea. Using Hue / Saturation Slider we can easily change the color of the teeth from yellow to white.
Note:
1. Open Photopea
2. Drag and Drop the Image. Sample Images 1 2
3. Add a Hue / Saturation Adjustment Layer
4. Select the Yellow Range
5. Adjust the Slider to select only the teeth
6. Change the Saturation to -100 and Lightness to 100
7. Reduce the Hue a little it
8. Brush in the Raster Mask to only affect the Teeth
That's it. Thanks for Watching
Also Watch:
Remove Fence in Photopea: https://youtu.be/OBaZaIpqcFc
Subscribe us:
http://bit.ly/Subscribe-fandD
Thursday, September 16, 2021
Remove Fence from Photo using Photopea | Photopea Tutorial | Browser Pho...
Photopea Tutorial - Remove Fence from a Photo using a Free Online Photo Editor Photopea
Hi Everyone, This is Daniel. In this video I'm gonna show you How to Remove Fence from a Photo using a free online photo editor called Photopea.
Note:
Photopea is the Browser Alternative for Photoshop. You can try this same method in Photoshop as well
Steps:
1. Drag and Drop the Image in Photopea. ( Sample Images 1 2 )
2. Select Quick Mask Mode
3. Select Brush Tool with Black Color
4. Draw over the Fence
5. Deselect the Quick Mask Mode it will make the drawing to selection
6. Inverse the Selection
7. Select Spot Healing Brush and Draw over the selection
8. Remove Errors using Patch Tool and Clone tool
9. Enhance the Colors
That's it. Thanks for Watching
Also Watching
Cut Out Hair in Photopea: https://youtu.be/Z-WdgXXixSQ
Subscribe us:
http://bit.ly/Subscribe-fandD
Sunday, September 12, 2021
How to Cut Out Hair in Photopea | Remove Background with Complicated and...
Photopea Tutorial - Cut Out Hair Easily
Hi Everyone, This is Daniel from f&D. In this video, I'm gonna show you How to Cut Out Hair using Photopea. This Hair Masking can be easily done in Photopea which is the free browser Alternative for Photoshop. By using this method we can easily remove background with Complicated, Messy or Curly Hair which will have more fly away hair strands.
This method only works if the background is in light color then the Hair need to be in dark color. If the Hair is in Light Color then the Background need to be in Dark Color. So that it will be easier to cut out hair or remove background.
Steps:
1. Open the Image in Photopea (Sample Image)
2. Extract the person from the background except the messy hair as New Layer.
3. Duplicate the Original Image
4. Make it Black and White
5. Use the Curves to make the Hair Darker and Background Lighter
6. Select Color Range - Shadows
7. Add Raster Mask to Original Image and Hide the Black and White Layer
That's it. This is how we can cut out hair or remove background with complicated hair.
Also Watch:
Remove Background using Magic Cut: https://youtu.be/TTQMYEkdKro
Subscribe us:
http://bit.ly/Subscribe-fandD
Wednesday, September 1, 2021
Windows 11 ISO Official Download | Windows 11 Insider | Win 11 ISO
Download Windows 11 ISO file from official website | How to download ISO File from Windows Insider
Hi Everyone, This is Daniel and I'm gonna show you How to Download Windows 11 ISO File from the Official Website.
Steps:
1. Go to insider.windows.com
2. Sign in to your Microsoft account
3. Register in Windows Insider Program
4. Go to ISOs Section
5. Download the Windows 11 ISO
That's it. Thanks for Watching
Also Watch:
Windows 11 Compatibility Check: https://youtu.be/2M6dY5CuGOM
Subscribe us:
http://bit.ly/Subscribe-fandD
Saturday, August 28, 2021
How to Download BGMI in PC or Laptop using Bluestacks 5 | BGMI PC download
Battlegrounds Mobile India (PUBG India) - Download, Install and Play in PC using Android Emulator called Bluestacks
In this video, I'm gonna show you How to play BGMI on PC using the Emulator called Bluestacks.
Steps:
1. Download BlueStacks 5 from Official Website
2. Install and Open it
3. Open Playstore and Sign in with your google account
4. Download BGMI and Open it
5. Sign in with your Facebook Account
6. Adjust the Graphics Settings
7. Play the Game
That's it. Thanks for Watching
Also Watch:
Installing Apps on Bluestacks using Playystore - https://youtu.be/Ypqf_bPqIGw
Subscribe us:
http://bit.ly/Subscribe-fandD
Sunday, August 22, 2021
Photopea Tutorial - Two Color 3D Text Effect | Photopea Text Effect
Photopea Text Tutorial - Two Color 3D Text Effect
Hi Everyone, In this video I'm gonna show you How to create Two Color 3D Text Effect in Photopea. We are using pink and cyan color in this video, you can also any two different colors.
Steps:
1. Create a New Project
2. Add Text, Change the Color to Cyan and Add Dark Blue Stroke
3. Duplicate the Text and Move it down and move the layer below the text
4. Change its Color to Pink
5. Add Shapes to make it 3D Text
6. Change the Background Color to Stroke Color
7. Make every layer except the Background to Group and Add White Stroke
8. That's it, You can also change the Colors of the Text and Stroke Color
Also Watch:
Photopea Neon Text: https://youtu.be/z62tR2UlXs4
Subscribe us:
http://bit.ly/Subscribe-fandD
Subscribe to:
Posts (Atom)
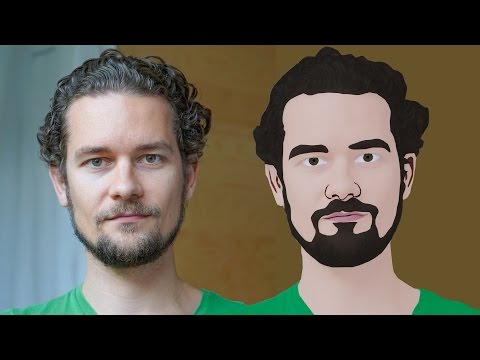
GIMP Cartoon Effect Tutorial
Hi Everyone, In this video I'm gonna show you How to create a Cartoon Version of Yourself or Someone using the Open Source Software...
-
Make your Image sing and vibe for a Song using an Android App Hi Everyone, This is Daniel from f&D. In this video, We are going to see ...
-
Photopea - Neon Text Effect Tutorial Hi Everyone, In this video I'm gonna show you How to make Neon Text Effect in Photopea. This phot...

