Sunday, September 13, 2020
GIMP tutorial – Creating Space Artwork | GIMP 2.10 tutorial
GIMP Tutorial #108
Hi Everyone, In this video I'm going to do Space Artwork in GIMP from Scratch
GIMP tutorial - Creating space artwork | GIMP 2.10 tutorial. This is our fourth GIMP tutorial this year. GIMP 2.10 is used in this video. In this video I will be creating space artwork from scratch in GIMP 2.10.
This tutorial will be easy to follow for both beginners as well as for advanced users too and this tutorial assumes that the viewer is absolute beginner in GIMP 2.10 however knowledge about GIMP basics will make it easier for you to understand and follow the video.
GIMP 2.10 has great advanced features than previous versions of GIMP. GIMP is not only used in editing images but can also be used to create artwork like the one in the video.
If you’re learning editing then GIMP is a must learn free open source application. Still in 2020 GIMP is a great alternative for photoshop. If you a beginner and if you want to learn about GIMP artwork then this video is for you.
Download the Project File here: https://gumroad.com/l/prVfE
Note:
GIMP is the perfect Alternative for Photoshop. Hence you can try this same method in Photoshop as well.
Steps:
1. Open GIMP
2. Create Sky Background
3. Add Stars and Supernovas
4. Then create different types of Planet and place it in the project
5. Place the Rocket Image in the Project : https://pixabay.com/vectors/rocket-space-ship-space-launch-312767/
6. Add the Rocket Smoke
7. Add the Shooting Star in the Space
That's it.
Thanks for Watching
Also Watch:
GIMP Lineart: https://youtu.be/xjj_X0uJOFk
Subscribe us:
http://bit.ly/Subscribe-fandD

Wednesday, September 2, 2020
GIMP Line Art tutorial for beginners 2020 | GIMP 2.10 tutorial for begin...
GIMP Tutorial #107 - Line Art
Hi Everyone, This is Daniel, In this video we are going to see How to make Line Art in GIMP.
GIMP line art tutorial for beginners 2020 | GIMP 2.10 Tutorial. This is our third video in about GIMP 2020. Line art is one of the most creative and easy editing style in GIMP 2.10. This GIMP tutorial for beginners shows that GIMP 2.10 is a great tool to create stunning line art.
This tutorial is for beginners (GIMP Basics) also intermediate and pro GIMP users and the version of GIMP used in this video is 2.10. GIMP in 2020 is still the best alternative for photoshop.
This tutorial will also help beginners to create cool line art from images. GIMP 2.10 contains advanced features like MyPaint Brush tool which makes it easy to create Line art in GIMP. If you are learning editing then you must learn how to create line art in GIMP 2.10. With GIMP 2.10 you can line art from image very easily.
This tutorial will be easy to follow for both beginners as well as for advanced users too. GIMP 2.10 is easy to use and it’s a great alternative for photoshop. So if you want to learn GIMP line art then this beginner tutorial is for you And in this tutorial I have used wacom tablet to draw the Line Art.
How to Set Up Wacom Tablet in GIMP - https://youtu.be/Xypw50ueWRk
This Tutorial is done using Wacom Tablet. If you want to make Line Art using Mouse, Comment in the Comment box, If I get more comments I will make one.
Note:
GIMP is the perfect alternative for photoshop. Hence you can try this same method in Photoshop as well.
Steps:
1. Open your Image in GIMP
2. Add a New Transparent Layer
3. Select MyPaint Brush Tool
4. Draw your Line art as shown in the video
5. Add Shadows on new layer
That's it.
Thanks for Watching
Also Watch:
GIMP Cartoon Effect: https://youtu.be/PbtukN4o1Hw
Subscribe us:
http://bit.ly/Subscribe-fandD
Monday, July 27, 2020
How to record screen on windows 10 WITH WEBCAM using OBS
This is Daniel and in this video you’ll learn How to record screen on windows 10 WITH WEBCAM using OBS. There are so many ways to record screen on windows 10 but do you know that there is a free software to record screen on windows 10.
One of the most frequently asked question is how to record screen with OBS & I’ll show you how to do that. sometimes you may have to record both screen and webcam in such case this method will be very helpful OBS.
By changing few things you’ll be able to record webcam and screen at the same time and in this video (I have also covered how to record your computer screen and webcam both simultaneously). And by the way the free software which I am using in this video is OBS studio (available for Mac, Windows, & Linux).
When you want to record screen on windows 10 there are many paid software’s but OBS is a open source software to record PC screen in windows 10 with webcam. So, if you want to know how to record screen on windows 10 with webcam using OBS then follow this video.
Steps:
1. Install the OBS Software - https://obsproject.com/download
2. Open the OBS
3. In the Source TAB add Desktop Source to Record the Screen of your Computer
4. Then Add Video Capture Device Source
5. In that Select your Webcam, This will capture your Webcam
5. Adjust the Settings like FPS etc
6. Transform the Size of the Webcam
That's it.
Thanks for Watching
Also Watch:
Record PC Screen OBS: https://youtu.be/zKLmng5uOHw
Subscribe us:
http://bit.ly/Subscribe-fandD
Wednesday, April 29, 2020
How to Record your Screen in Windows 10 for Free using OBS
Hi Everyone, In this video I'm gonna show you How to record your PC Screen in Windows 10 or any other operating system using the free software called OBS: Open Broadcaster Software.
Steps:
1. Download OBS: https://obsproject.com/
2. Install it
3. Make the Settings suitable for Recording
4. Change format, resolution and add shortcut keys if you need
5. Add Display Capture
6. Fit it to Screen
7. Add audio capture if you are going to record
8. Start Recording and Stop Recording
9. Open the folder which the video recorded and you will be seeing the recorded screen of your PC.
That's it. Thanks for Watching
Also Watch:
OBS Black Screen FIX: https://www.youtube.com/watch?v=Cpx39JwLoR0
Subscribe us:
http://bit.ly/Subscribe-fandD
Sunday, April 19, 2020
Toxic Picsart Editing | Picsart Editing Tutorial
Picsart Tutorial
Hi Everyone, In this video I'm gonna show you How to create Toxic Picsart Editing. Picsart is the free Image Editing app for Android and iOS. This New style of Editing starts to trend after Vijay Mahar posting this kind of Editing in Instagram.
Also Watch:
Map Face in Picsart: https://youtu.be/W9W0nEYRWDI
Subscribe us:
http://bit.ly/Subscribe-fandD
#picsart #toxicediting #picsartediting
Wednesday, April 8, 2020
GIMP Tutorial - Circle Pop Out Effect | GIMP Photo Editing | #106
GIMP Tutorial #106
Hi Everyone, This is Daniel, In this video I'm gonna show you How to create Circle Pop Out using the Free and Open Source Software called GIMP
Note:
GIMP is the perfect Alternative for Photoshop. Hence you can try this same method in Photoshop as well.
Images:
Galaxy
Background
Steps:
1. Create a New Image of 1920*1080 px
2. Drag and Drop your Image
3. Remove the Background
4. Add a Circle and Layer mask the Galaxy Image into it
5. Make the Subject Image Pop Out by erasing the outside pixels
6. Add a Background
That's it
Subscribe us:
http://bit.ly/Subscribe-fandD
Friday, October 4, 2019
Creative Mobile Photography #1
Mobile Photography #1
Hi Everyone, This is Daniel. In this video I'm gonna show you How to do the Slice Ball Freeze Frame Mobile Photography Trick
Subscribe us:
http://bit.ly/Subscribe-fandD
Thursday, September 26, 2019
How to Create Simple Ocean Animation in Blender 2.8
Blender Tutorial
Hi Everyone, This is Daniel, In this video I'm gonna show you How to Create a Simple Ocean Animation in Blender 2.8
Also Watch:
Water Text Animation: bit.ly/Water_text
Subscribe us:
http://bit.ly/Subscribe-fandD
Friday, August 30, 2019
Create Passport Size Photo in Free Software (GIMP) | #105
GIMP Tutorial #105
Hi Everyone, This is Daniel, In this video I'm gonna show you How to create the Passport Size Photo using the Free and Open Source Software called GIMP
Note:
GIMP is the perfect Alternative for Photoshop. Hence you can try this same method in Photoshop as well.
Also Watch:
Bidirectional Illusion face in GIMP - http://bit.ly/bidirection_face
Subscribe us:
http://bit.ly/Subscribe-fandD
#gimp #passportsizephoto #gimptutorial
Wednesday, August 21, 2019
How to Install Screencast Keys in Blender 2.8
Blender Tutorial
Hi Everyone, This is Daniel, In this video we are going to learn How to install screencast keys using the add-on called shortcut_VUr by Jayanam
Download Link : https://github.com/jayanam/shortcut_VUr
Subscribe us:
http://bit.ly/Subscribe-fandD
Wednesday, August 14, 2019
GIMP Tutorial - Bidirectional illusion face | Photoshop Alternative | #104
Hi Everyone, This is Daniel from f&D, In this video I'm gonna show you How to create Bidirectional Illusion Face Effect in GIMP
Note:
GIMP is the Perfect Alternative for Photoshop. Hence you can try this same method in Photoshop as well
Needed: 1. Straight looking Photo 2. Side looking Photo
Steps:
1. Open GIMP and drag and drop your Straight looking image
2. Remove Background
3. Add Side looking Image
4. Also Remove the Subject instead of background
5. Adjust the Side looking image infront of the Straight looking image to get the illusion effect
6. Grab Fuzzy Select Tool and Select the Transparent area of the Side looking Image
7. Add Layer Mask with Selection to the Straight looking Image
8. Add a Background
That's it.. This is way you can create the Bidirectional Illusion Face Effect.
Thanks for Watching
If you like this video, Give thumbs up and Subscribe this channel for more Future GIMP Tutorials
Also Watch:
How to create Rodilius(Fractalius) Effect in GIMP: http://bit.ly/rodilius_effect
Subscribe us:
http://bit.ly/Subscribe-fandD
Subscribe to:
Posts (Atom)
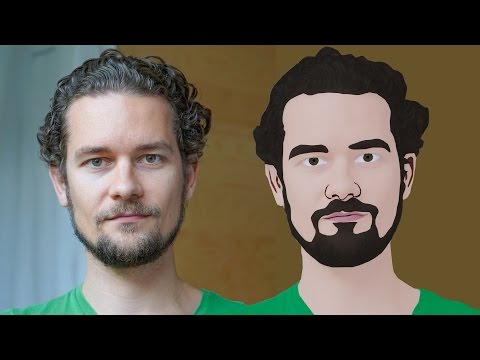
GIMP Cartoon Effect Tutorial
Hi Everyone, In this video I'm gonna show you How to create a Cartoon Version of Yourself or Someone using the Open Source Software...
-
Make your Image sing and vibe for a Song using an Android App Hi Everyone, This is Daniel from f&D. In this video, We are going to see ...
-
Photopea - Neon Text Effect Tutorial Hi Everyone, In this video I'm gonna show you How to make Neon Text Effect in Photopea. This phot...

