Invite Midjourney Bot to your Server
Hi Everyone, This is Daniel from f&D. In this video, We are going to see How to Invite Midjourney Bot to your discord server.
Steps
00:00 About
00:08 Intro
00:15 Create a Server
00:46 Add Midjourney Bot
01:29 Trying Prompts in Server
01:54 Outro
Thanks for Watching
Also Watch:
Buy Subscription on Midjourney: https://youtu.be/A5z20A9nbIo
Subscribe us:
http://bit.ly/Subscribe-fandD
Sunday, April 16, 2023
Saturday, April 1, 2023
Free Midjourney V5 Alternative | Discord | Unlimited Free Images | Bluew...
Free Midjourney Alternative - Bluewillow AI
Hi Everyone, This is Daniel from f&D. In this video, We are going to see the Free Alternative for Midjourney V5. Since Midjourney has locked its Free Trial for temporary period, there is another AI Image Generator which you can use it on discord which is called Bluewillow AI.
This Bluewillow which is pretty much similar to Midjourney. Even the initial command is 'imagine' which we use on midjourney and then we type the image or text prompts and then parameters.
Like in Midjourney we also have V and U buttons which means variations and upscale respectively. So Bluewillow AI is the perfect alternative for Midjourney.
Saturday, March 25, 2023
How to Use GPT-4 for Free | Try Chat GPT 4 for Free | Bing Chat | Nat Dev
GPT-4 can be accessed for FREE using this two simple methods.
Hi Everyone, This is Daniel from f&D. In this video, I'm gonna show you How to try GPT - 4 for Free using two different methods without subscribing to ChatGPT Plus.
First method is using Microsoft Bing AI Chat and the next one is using nat.dev website. You can see on the Microsoft Bing Blogs Bing AI chat is running on gpt - 4 so you can now try the gpt - 4 using the Bing AI Chat.
Also the second method of using gpt 4 is using the nat dev website where there many models are available including gpt 4 and also gpt 3.5 which is the free version of chatgpt. But the only limitation in nat dev is you cannot give unlimited inputs to gpt 4 ai language model. Also here you can compare multiple language models at once.
Wednesday, March 22, 2023
How to Use Reference Image in Midjourney | How to upload images in Midjo...
Upload and Use Reference Images in Midjourney
Hi Everyone, This is Daniel from f&D. In this video, We are going to see How to use reference images in midjourney to generate ai images. There are two different methods to upload images in midjourney. One is directly uploading the images in discord and another one is using third party website.
To use reference images to need to paste your link before the prompt in midjourney discord.
Thanks for Watching
Also Watch:
Getting Started in Midjourney: https://youtu.be/UDpUpvg-mXU
Subscribe us:
http://bit.ly/Subscribe-fandD
Wednesday, March 15, 2023
How do I use Midjourney AI | Getting Started with Midjourney AI
Midjourney Beginner Guide (A.I. Art)
Hi Everyone, This is Daniel from f&D. In this video, I'm gonna show you How to generate A.I. Images using Midjourney. It is the discord server where you can type your prompt and convert into image. Basically it is the text to image generator.
Notes:
To generate images using Midjourney, you need to have a discord account. Create a new discord account and login using that. Then go to Midjourney website and join the beta. After that you can use the Midjourney bot as I mentioned in the video.
Websites:
https://www.midjourney.com/
https://discord.com/
00:00 Introduction
00:08 Channel Intro
00:15 Discord Account
00:54 Joining Midjourney Server
01:13 Verify your E-mail
01:32 Midjourney Info
02:50 AI Image Generation
06:06 Midjourney Subscription
06:55 Outro
Thanks for Watching
Also Watch:
Easy Way to Remove Background using Photopea with Photoroom - https://youtu.be/F24nNBEJ7Kw
Subscribe us:
http://bit.ly/Subscribe-fandD
Saturday, January 7, 2023
How to add HDR Effect to Video in just a Click | Instagram Viral HDR Effect
HDR Effect to a Video
Hi Everyone, This is Daniel from f&D. In this video I'm gonna show you How to add Instagram Viral HDR Effect to a Video in a just a click using the App called Time cut. Time Cut App Steps: 1. Open Playstore 2. Download Time Cut : Smooth Motion App 3. Open the App to add HDR Effect 4. In the New Tab Section you can find the 3 HDR Effects 5. Select one of them to add 6. It will ask to purchase Time cut pro or you can watch the ad to unlock the HDR Effect feature for one day 7. Select the video to add HDR Effect That's it Thanks for Watching Also Watch Instagram Trending 3D Zoom and Strobe Effect without Capcut App Subscribe us: http://bit.ly/Subscribe-fandDMonday, September 12, 2022
Create Stretched Text Effect in Photopea | Photopea Tutorial
Photopea - Stretched Text Effect
Hi Everyone, This is Daniel form f&D. In this video, We are going to see How to make the Stretched Text Effect in Photopea.
Steps:
0:00 About Stretched Text Effect
0:06 Intro
0:15 Open a Project in Photopea
0:25 Type a Text
1:05 Convert Text to Shape
1:16 Select Direct Select Tool
1:31 Draw the Below Half Selection
1:52 Stretch the Text
2:08 Brief
2:19 Conclusion
Also Watch:
Convert Anything to Gold - https://youtu.be/HJyu6EVFU4Y
Subscribe us:
http://bit.ly/Subscribe-fandD
Friday, August 5, 2022
How to Convert Anything to Gold in Photopea | Photo Editing | Free Photo...
Photopea - Convert Anything to Gold
Hi Everyone, This is Daniel from f&D. In this video, We are going to see How to Convert to Gold in Photopea. Photopea is the free browser alternative to Photoshop. Hence you can try this method in Photoshop as well.
Steps:
0:00 About Photopea Tutorial
0:09 Intro
0:16 Open your Image in Photopea
0:19 Remove the Background
0:48 Add New Black Background
1:03 Desaturate
1:24 Invert and Difference Blend Mode
2:05 Gold Gradient Map
2:27 Clipping Mask
2:34 Adding Depth
3:23 Conclusion
3:34 Outro
That's it. Thanks for Watching
Also Watch:
Creative Outline Text in Photopea - https://youtu.be/f2n_tGNmgE0
Subscribe us:
http://bit.ly/Subscribe-fandD
Wednesday, July 6, 2022
Photopea - Knockout Text Effect | Browser Photoshop
Photopea Editing Tutorial - Knockout Text
Hi Everyone, This is Daniel from f&D. In this video, I'm gonna show you How to create Knockout Text effect in Photopea. Photopea is the free browser alternative for Photoshop. Hence you can try this same method in Photoshop as well.
Steps:
00:00 About Photopea Tutorial
00:07 Intro
00:14 Create a New Project
00:25 Drag and Drop your Image
00:33 Add Rectangle Shape
00:51 Add Text
01:13 Text to Selection
01:20 Add Inverted Raster Mask
01:28 Hide the Text Layer
01:34 Overview
01:51 Outro
Thanks for Watching
Also Watch:
Chalk Effect in Photopea: https://youtu.be/PHCD9Pa2H8c
Subscribe us:
http://bit.ly/Subscribe-fandD
Tuesday, July 5, 2022
Photopea - Chalk Effect | Free Browser Photoshop
Photopea Editing - CHALK EFFECT
Hi Everyone, This is Daniel from f&D. In this video, We are going to see How to create Chalk Effect in Photopea. This effect is creating the mock-up of drawing in black board using chalk piece. This effect is created in Photopea which is the free browser photoshop alternative, which can be used in any browser. So you can try this any devices like mobile, tablet, laptop and pc.
Photopea is the browser alternative for Photoshop. Hence you can try this same method in Photoshop as well.
Images to Download: Black Board Man
Steps:
00:00 About Photopea Tutorial
00:06 Intro
00:14 Open Photopea and Black Board Image
00:24 Drag and Drop the Subject Image
00:42 Remove Background
01:32 Filter - Stylize - Find Edges
01:46 Add Levels
02:12 Add Invert
02:26 Change the Blending Mode
02:43 Blending Options
03:13 Full Overview
03:39 Outro
Thanks for Watching
Also Watch:
Paper Texture: https://youtu.be/Px1mlC5DOuo
Subscribe us:
http://bit.ly/Subscribe-fandD
Monday, July 4, 2022
Photopea - How to Create Crumbled PAPER TEXTURE | Free Browser Photoshop
Hi Everyone, This is Daniel from f&D. In this video, I'm gonna show you How to create Paper Texture from scratch in photopea. This paper texture is crumbled. Photopea is more or less same as the photoshop, Hence if you are familiar in photoshop you can easily recreate this same method in photoshop as well.
Steps:
00:00 About Photopea Tutorial
00:07 f&D Intro
00:12 Open Photopea and Create a New Image
00:34 Use Gradient Tool to create Diamond Gradients
01:06 Filter - Stylize - Emboss
01:46 Add Levels to Adjust the Texture
02:08 Adding Text over the Texture
02:44 Adding Blending Options to the Text
02:59 Adjust the Levels
03:23 Thanks for Watching
03:33 Outro
Thanks for Watching.
Also Watch:
How to Add Spot Light Effect in Photopea - https://youtu.be/EhZl7DJpHfE
Subscribe us:
http://bit.ly/Subscribe-fandD
Subscribe to:
Posts (Atom)
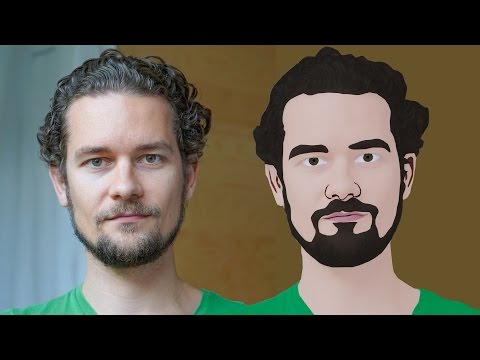
GIMP Cartoon Effect Tutorial
Hi Everyone, In this video I'm gonna show you How to create a Cartoon Version of Yourself or Someone using the Open Source Software...
-
Make your Image sing and vibe for a Song using an Android App Hi Everyone, This is Daniel from f&D. In this video, We are going to see ...
-
Photopea - Neon Text Effect Tutorial Hi Everyone, In this video I'm gonna show you How to make Neon Text Effect in Photopea. This phot...

