Photopea Tutorial 1
Hi Everyone, This is Daniel from f&D, In this video I'm gonna show you How to remove background and extract the person or objects using pen tool in Photopea
Note:
Photopea is the free alternative for Photoshop which can be used in any device because it is browser based.
Steps:
1. Drag and Drop the Image inside Photopea
2. Select Pen Tool
3. Draw the Anchor Points around the subject
4. Change the fill to none
5. Change the Shape to Path
6. Make Selection
7. Ctrl + J to Duplicate the Layer with Selection
8. Hide the Original Layer
That's it. Thanks for Watching
Also Watch:
Alternative to Photoshop - The Photopea : https://youtu.be/SihTdfPWOxk
Subscribe us:
http://bit.ly/Subscribe-fandD
Wednesday, May 19, 2021

Friday, April 23, 2021
Runaway Aurora Filter | Runaway Aurora Reels Filter Tutorial | How to Ru...
Runaway Aurora Filter Instagram Effect
Hi Everyone, In this video I'm going to show you How to Runaway Aurora Effect Trend in Instagram.
Steps:
First Open Instagram on your Mobile Phone and press plus icon in the top left corner.
Go to Reels Option and select the effects option in the left side. Drag right until the last to select the browse effects option
Click on the browse effects option and search for runaway aurora.
And select Runaway Aurora from renaldfadli
Click on Try it. You can see silhouette effects are coming on your screen. Be creative and practice what you should do when the Silhouette option come. On one beat the effect will come. Make sure your Background is White or Lighter Color
Press and hold to capture the video. On a beat it will give silhouette effect be sure to do your poses exactly when the effect in action.
This is the Output. Click on the Download symbol in the top. That's it. Thanks for Watching
Monday, April 19, 2021
How to Funny Maya Hee Maya Hu Edit from a Photo | Animate Face from Pho...
Biugo App
In this video, I'm gonna show you How to make a Image / Photo to sing a Maya hee Maya hu song. This is also called as Numa Numa Meme. This is the viral Instagram and TikTok Trend where you will Animate a Single Photo to sing a particular song which looks very funny.
How to:
First Open Play Store and download the App. Search for biugo and Install it.
Biugo-video maker, photo maker, video editor is the app name. After installing, Open it.
Cick on the Search icon on the app and search maya hee and Select the Funny Maya Hee Deepfake
Click on Watch Ads to Try, You can also Subscribe to the Premium version for no ads
Select your Image with face. Then click Ok. Active Internet Connection Required for these process.
Now you can save this on your device or you can share it on social media. To remove the Biugo logo you can upgrade to premium version by either paying some amount per month or using 3 day free trial
So here is the result. You can try it and share your thought on the comment section.
That's it. Thanks for Watching.
Also Watch:
Cartoon Effect in a Click: https://www.youtube.com/watch?v=avswN...
Subscribe us:
http://bit.ly/Subscribe-fandD
Tuesday, April 13, 2021
GIMP 2.10 - Remove Background using Path Tool | #Shorts
Let's see How to remove Background in GIMP using Path Tool in this #Shorts video.
Select the Path Tool. Draw the path around the subject. Make sure to add path nodes slightly inside the subject for better results. To finish the path loop ctrl plus click at the end.
Go to Select - from path to make the Selection. Add Alpha Channel to the Layer
Again go to select invert and then press delete key to remove the background
To save, Go to File - Export as and change the extension as .png and change compression to lower level increase the image quality
That's it. For more videos like this please do subscribe.
This is the quickest format video. You can also Watch the Full Length Tutorial on How to remove background using Path Tool: https://www.youtube.com/watch?v=JQbNIdfg4mM
Subscribe us:
http://bit.ly/Subscribe-fandD
Friday, April 2, 2021
GIMP - Sliced Text | Photoshop Alternative | GIMP #Shorts
In this video, We are going to see How to make the Sliced Text Effect in GIMP. GIMP is the GNU Image Manipulation Program which is used to edit images
Note:
GIMP is the Perfect Alternative for Photoshop. Hence you can try this same method in Photoshop as well
Steps:
1. Add a Text
2. Slice the Text using Free Select Tool
3. Cut and Paste as New Layer
4. Add a Shadow
That's it. Thanks for Watching
Also Watch:
GIMP Popout Effect: https://youtu.be/-0iWldyqR-A
Subscribe us:
http://bit.ly/Subscribe-fandD
Sunday, March 28, 2021
GIMP - Pop Out Text | Photoshop Alternative #Shorts
Hi Everyone, This is Daniel from f&D, In this video We are going to see How to make Pop Out Text Effect in GIMP. GIMP is the free Image Manipulation Software
Note:
GIMP is the perfect Alternative for Photoshop. Hence you can try this same method in Photoshop as well
Steps:
1. Create Text Layers in Separate Layers
2. Position the Text layers below or above
3. Scale the Text if Necessary
4. Make the Text Layer to Image Size
5. Add Drop Shadows to the Text Layers except the Bottom Text
That's it. Thanks for Watching
Also Watch:
GIMP Reflection: https://www.youtube.com/watch?v=Ab4m6...
Subscribe us:
http://bit.ly/Subscribe-fandD
Wednesday, March 17, 2021
GIMP - Convert Image to Pixel Art | Pixel Effect | Photoshop Alternative
GIMP Tutorial - Pixel Art
Hi Everyone, This is Daniel, In this video I'm gonna show you How to Convert a Normal Image into a Pixel Art Image using the free and Open Source Software called GNU Image Manipulation Program abbreviated as GIMP
Note:
GIMP is the Perfect Alternative for Photoshop. Hence you can try this same method in Photoshop as well
Steps:
1. Open your Image in GIMP
2. Scale the Image to 100px
3. Select the Pencil and in the tools option change its hardness to 100% and size to 1 for pixel art
4. Add a Transparent Background and draw the outline and fill the color using color picker and bucket fill tool
5. Add Shadows and Highlights
6. Scale the Image back to its original size with interpolation 'none'
That's it. You just created your pixel art by converting the normal image
Thanks for Watching
Also Watch:
GIMP Cartoon Effect: https://www.youtube.com/watch?v=PbtukN4o1Hw
Subscribe us:
http://bit.ly/Subscribe-fandD
Monday, March 1, 2021
Create a Cartoon Version of Yourself in just a click | ToonApp #Shorts
Hi Everyone, In this video, We are going to see How to create a Cartoon Version of yourself in just a click for free using an android app called ToonApp. This is the Android app and it is very easy and you don't any drawing skill. You can just select your photo and the app will convert it into a cartoon
Steps:
1. Go to Google Playstore
2. Install the App: https://play.google.com/store/apps/details?id=com.lyrebirdstudio.cartoon
3. Open it
4. Allow Toon App to Access your Photos from Gallery
5. Select your Photo
6. Adjust the Position and click on the tick icon in the top right corner
7. Add Background if you want
8. Save the Image
That's it.. Thanks for Watching
If you like this video give thumbs up and subscribe this channel
Also Watch:
GIMP Cartoon Effect: https://www.youtube.com/watch?v=PbtukN4o1Hw
Subscribe us:
http://bit.ly/Subscribe-fandD
Tuesday, February 9, 2021
GIMP Tutorial - Convert Normal Art to Pixel Art
GIMP Tutorial #110
Hi Everyone, This is Daniel, In this video We are going to see How to convert a Normal Art into the Pixel Art using the Open Source Image Editing Software called GIMP
Note:
GIMP is the free Alternative to Photoshop. Hence you can try this same method in Photoshop as well
Steps:
1. Open your Normal art into GIMP
2. Scale the Image down to 100 px and resolution to 72 px
3. Add a New Transparent layer and draw the Outline using the pencil tool with 1 px size and hardness of 100%
4. Fill the colors using bucket fill tool
5. Add another transparent layer and draw shadow on it
6. Add another transparent layer and draw highlights on it
7. Scale back to the original size with the interpolation none
That's it.. Thanks for Watching
Also Watch:
GIMP Line Art: https://youtu.be/xjj_X0uJOFk
Subscribe us:
http://bit.ly/Subscribe-fandD
Sunday, September 13, 2020
GIMP tutorial – Creating Space Artwork | GIMP 2.10 tutorial
GIMP Tutorial #108
Hi Everyone, In this video I'm going to do Space Artwork in GIMP from Scratch
GIMP tutorial - Creating space artwork | GIMP 2.10 tutorial. This is our fourth GIMP tutorial this year. GIMP 2.10 is used in this video. In this video I will be creating space artwork from scratch in GIMP 2.10.
This tutorial will be easy to follow for both beginners as well as for advanced users too and this tutorial assumes that the viewer is absolute beginner in GIMP 2.10 however knowledge about GIMP basics will make it easier for you to understand and follow the video.
GIMP 2.10 has great advanced features than previous versions of GIMP. GIMP is not only used in editing images but can also be used to create artwork like the one in the video.
If you’re learning editing then GIMP is a must learn free open source application. Still in 2020 GIMP is a great alternative for photoshop. If you a beginner and if you want to learn about GIMP artwork then this video is for you.
Download the Project File here: https://gumroad.com/l/prVfE
Note:
GIMP is the perfect Alternative for Photoshop. Hence you can try this same method in Photoshop as well.
Steps:
1. Open GIMP
2. Create Sky Background
3. Add Stars and Supernovas
4. Then create different types of Planet and place it in the project
5. Place the Rocket Image in the Project : https://pixabay.com/vectors/rocket-space-ship-space-launch-312767/
6. Add the Rocket Smoke
7. Add the Shooting Star in the Space
That's it.
Thanks for Watching
Also Watch:
GIMP Lineart: https://youtu.be/xjj_X0uJOFk
Subscribe us:
http://bit.ly/Subscribe-fandD
Wednesday, September 2, 2020
GIMP Line Art tutorial for beginners 2020 | GIMP 2.10 tutorial for begin...
GIMP Tutorial #107 - Line Art
Hi Everyone, This is Daniel, In this video we are going to see How to make Line Art in GIMP.
GIMP line art tutorial for beginners 2020 | GIMP 2.10 Tutorial. This is our third video in about GIMP 2020. Line art is one of the most creative and easy editing style in GIMP 2.10. This GIMP tutorial for beginners shows that GIMP 2.10 is a great tool to create stunning line art.
This tutorial is for beginners (GIMP Basics) also intermediate and pro GIMP users and the version of GIMP used in this video is 2.10. GIMP in 2020 is still the best alternative for photoshop.
This tutorial will also help beginners to create cool line art from images. GIMP 2.10 contains advanced features like MyPaint Brush tool which makes it easy to create Line art in GIMP. If you are learning editing then you must learn how to create line art in GIMP 2.10. With GIMP 2.10 you can line art from image very easily.
This tutorial will be easy to follow for both beginners as well as for advanced users too. GIMP 2.10 is easy to use and it’s a great alternative for photoshop. So if you want to learn GIMP line art then this beginner tutorial is for you And in this tutorial I have used wacom tablet to draw the Line Art.
How to Set Up Wacom Tablet in GIMP - https://youtu.be/Xypw50ueWRk
This Tutorial is done using Wacom Tablet. If you want to make Line Art using Mouse, Comment in the Comment box, If I get more comments I will make one.
Note:
GIMP is the perfect alternative for photoshop. Hence you can try this same method in Photoshop as well.
Steps:
1. Open your Image in GIMP
2. Add a New Transparent Layer
3. Select MyPaint Brush Tool
4. Draw your Line art as shown in the video
5. Add Shadows on new layer
That's it.
Thanks for Watching
Also Watch:
GIMP Cartoon Effect: https://youtu.be/PbtukN4o1Hw
Subscribe us:
http://bit.ly/Subscribe-fandD
Subscribe to:
Posts (Atom)
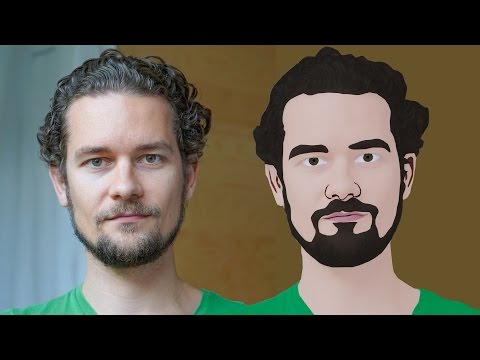
GIMP Cartoon Effect Tutorial
Hi Everyone, In this video I'm gonna show you How to create a Cartoon Version of Yourself or Someone using the Open Source Software...
-
Make your Image sing and vibe for a Song using an Android App Hi Everyone, This is Daniel from f&D. In this video, We are going to see ...
-
Spider-man Web Shooter Transition Tutorial using VN App | Spiderman Web Transition TikTok Trend | Instagram Trend Hi Everyone, In this vid...

