GIMP Tutorial #110
Hi Everyone, This is Daniel, In this video We are going to see How to convert a Normal Art into the Pixel Art using the Open Source Image Editing Software called GIMP
Note:
GIMP is the free Alternative to Photoshop. Hence you can try this same method in Photoshop as well
Steps:
1. Open your Normal art into GIMP
2. Scale the Image down to 100 px and resolution to 72 px
3. Add a New Transparent layer and draw the Outline using the pencil tool with 1 px size and hardness of 100%
4. Fill the colors using bucket fill tool
5. Add another transparent layer and draw shadow on it
6. Add another transparent layer and draw highlights on it
7. Scale back to the original size with the interpolation none
That's it.. Thanks for Watching
Also Watch:
GIMP Line Art: https://youtu.be/xjj_X0uJOFk
Subscribe us:
http://bit.ly/Subscribe-fandD
Tuesday, February 9, 2021
Subscribe to:
Comments (Atom)
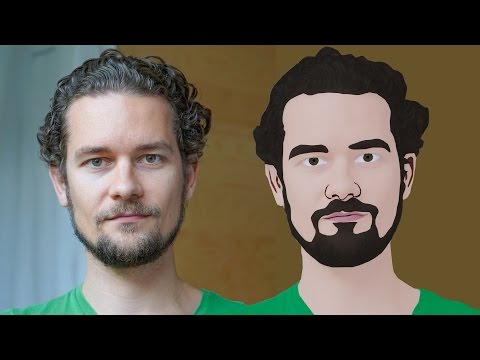
GIMP Cartoon Effect Tutorial
Hi Everyone, In this video I'm gonna show you How to create a Cartoon Version of Yourself or Someone using the Open Source Software...
-
Make your Image sing and vibe for a Song using an Android App Hi Everyone, This is Daniel from f&D. In this video, We are going to see ...
-
Photopea - Neon Text Effect Tutorial Hi Everyone, In this video I'm gonna show you How to make Neon Text Effect in Photopea. This phot...

